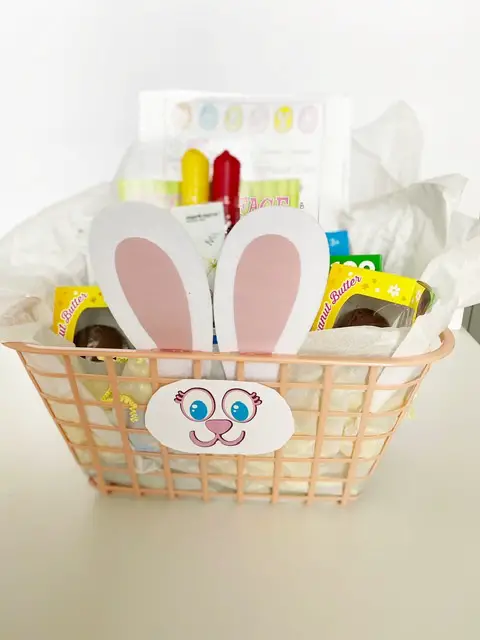
Overwhelmed by the idea and price tag of making an Easter basket? Then look no further, I’ve got you covered! I’ll show you How To Make An Easter Basket From Dollar Tree. No one will know (or believe) how easy and inexpensive it is!
Why I Love Dollar Tree
It’s safe to say that I LOVE Dollar Tree. They have so many fun and unique items at such a great price! My kids love it too. Anytime they earn money or get some for their birthday etc. they love to go to Dollar Tree and shop. They feel so accomplished and excited that they could afford anything in the store. Ha!
I’m not going to lie though, I was a little (ok, a lot) sad that their prices went up to $1.25 this year. Regardless, that is still a great price for their products and my kids and I still enjoy shopping there. I utilize their products for almost every birthday party, holiday, gifts, crafts, homeschool….so many things.
With a few tips and tricks, you can make some really cute, unique gifts that look like you spent way more than what you actually did. Not that the price tag on a gift is what matters, but you know what I mean. When you have 20 teachers, friends, acquaintances to shop for throughout the year, it can really add up! And for those of us who are on tight budgets, every dollar counts so I try to spend them wisely, but I also want people to feel valued and appreciated.
How To Make An Easter Basket From Dollar Tree
This year I had the great honor and privilege and making Easter baskets for some families who otherwise probably wouldn’t have gotten any. My kids are very blessed and fortunate to have a ton of family that live within 30 minute radius of us and we are so thankful for that! That being said, they get gifts, cards, baskets and candies from all of them-SO blessed!
With our kids receiving so many gifts from family, my husband and I typically keep our ‘fun’ holiday gifts small. We’ve also found we enjoy doing an activity together as a family and make a memory instead.
So this year, the kids and I went shopping at Dollar Tree. They picked out toys and candy they liked and a cute basket to give away. I did the same and went through the store and found things I would enjoy and put it in a basket to give to another mom in need.
Tips For Shopping At Dollar Tree
If you’ve never been in Dollar Tree, it can be somewhat overwhelming. So many aisles, some can be really picked over and if you don’t know what you’re looking for, you can miss out on some good buys!
Tip #1. Bigger is Better. I definitely recommend trying to find a bigger Dollar Tree to go to in your area. We are lucky enough to have a very big Dollar Tree just 15 minutes away from our house. Obviously with a bigger store you are more likely to have more options and a wider variety.
Tip #2. Find Out When They Re-stock. I’m somewhat of a regular at our Dollar Tree. My husband would probably laugh at the ‘somewhat’ but I happen to know what day their shipment arrives-Wednesdays! Which is the day I went shopping for these supplies and they had an abundance. So while you’re in store be sure and ask what day the shipment arrives and what day they re-stock.
Tip #3. Holiday Schedule. They typically put out seasonal and holiday decor one month before the holiday actually takes place. If you don’t go at the beginning of whatever season it is, chances are it will all be gone. So be sure and get their quick!
Tip #4. Order Online. Can’t find what you’re looking for in store? Don’t have time to go into a store? Order online! You used to have to order a whole case of an item but that has since changed and they usually ship to store for free.
Looking for more tips? I highly recommend following Do It On A Dime on youtube. She has some amazing Dollar Tree hacks!
Shopping For Your Easter Basket At Dollar Tree
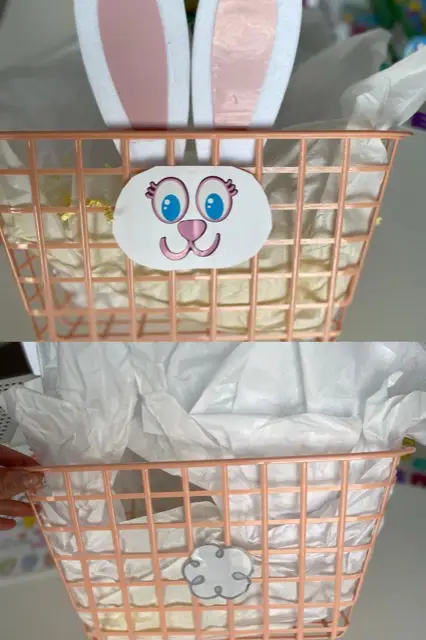
Step 1: Find A Cute Basket.
You may be thinking, duh! But we have to start somewhere and I suggest starting with the basket. The size and shape of the basket will affect what and how many items will fit so it’s a good place to start! They have several ‘Easter Basket’ options you can choose from, but I am all about resourcefulness so I went with a bigger basket that I can reuse later. Any fellow organization lovers out there?
I found this adorable basket in the kitchen and organization area. The color is perfect and very on point for Easter. They also had this adorable bunny basket decal, didn’t it turn out cute?!
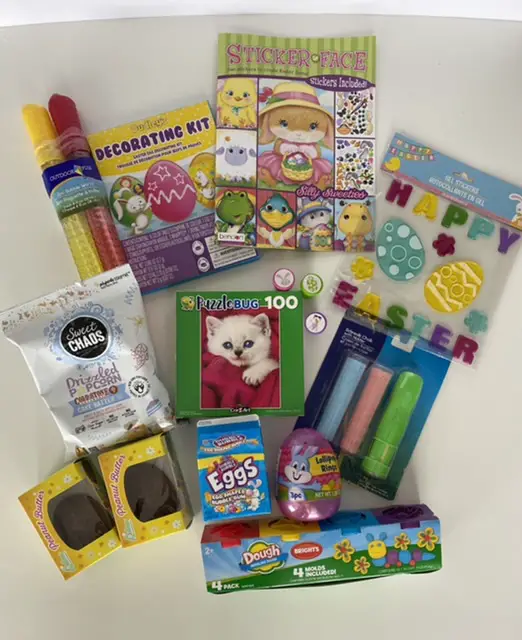
Step 2. Find Items for Your Basket.
They have such a good variety of items this year at the Dollar Tree. I found so many fun edible and non-edible items. I’m not too big on my kids consuming a ton of sugar, ironic because I love sharing sweet treat recipes, but we really don’t eat them on a regular basis. That being said, I love to get things kids can ‘do’ and not just eat.
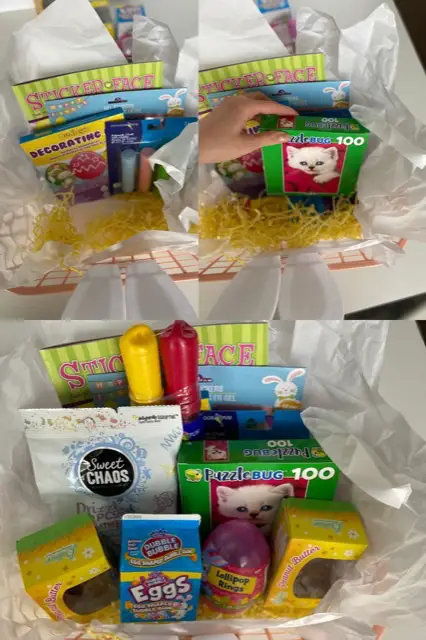
Every year, I let the kids pick out the fun window clings and they get to decorate their own windows. They love it! They had some really cute options this year as you can see. Because our baskets were for other kids we wanted to include as many of our favorites as possible. Window clings, sticker face book, egg dying kit, chalk, bubbles, puzzle, playdough and some sweet treats.
Step 3. Arrange Items In Basket.
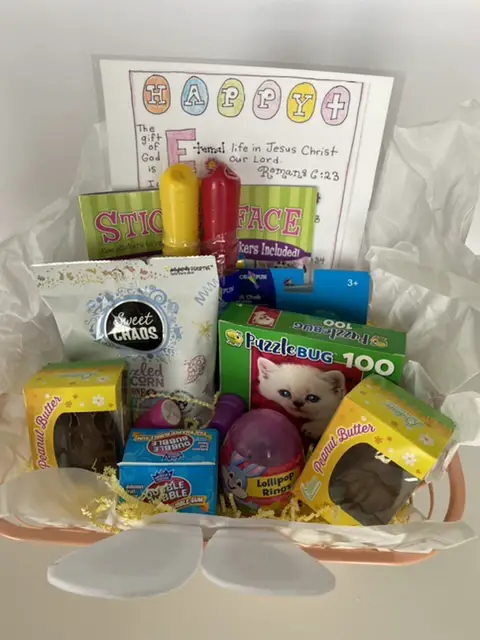
Again, this sounds obvious and simple, but it really is an art-almost like arranging flowers. I’m certainly no expert, but this is what I have found to work best! Because I used an actual basket it had some open holes so I put in some tissue paper first to keep any items from falling out. Next, I started by placing the taller items in the back and working my way towards the front.
Once I had the tall items arranged to where I liked them, I started on the smaller items. I kept the playdough out since it was an awkward shape. I found it worked perfect to stack the smaller items on top. To fill in any gaps or bare spots, I used some of Dollar Trees yellow paper shreds.
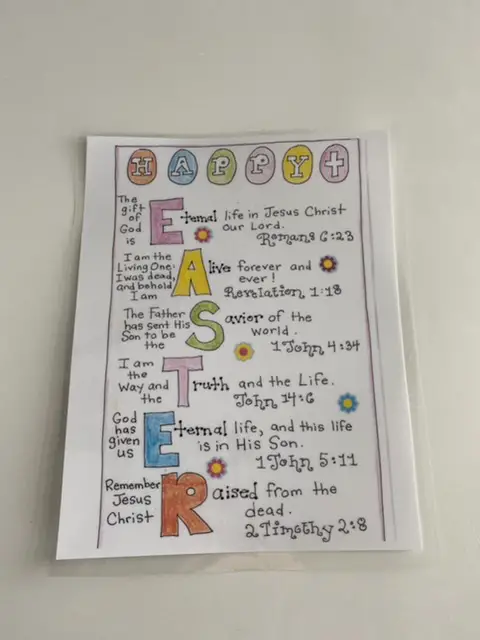
I wanted to give these baskets a bit of a personal touch so I printed and laminated this adorable Easter sheet. You can find this over at thehappyhomefairy.com. Love her printables!
I wanted this item to be more of a ‘focal point’ so I placed it at the back, where it would stick up just a bit so they would be sure to see it.
Almost done!
Step 4. Gift Wrapping.
This step isn’t always necessary. If you’re planning on giving them to your kids Easter morning you can certainly leave out this step. But if you’re planning on delivering it to your grandkid or neighbor, or maybe your like us and donating it to another family, this step not only makes it look ‘finished’ and adorable, but it also makes delivering much easier.
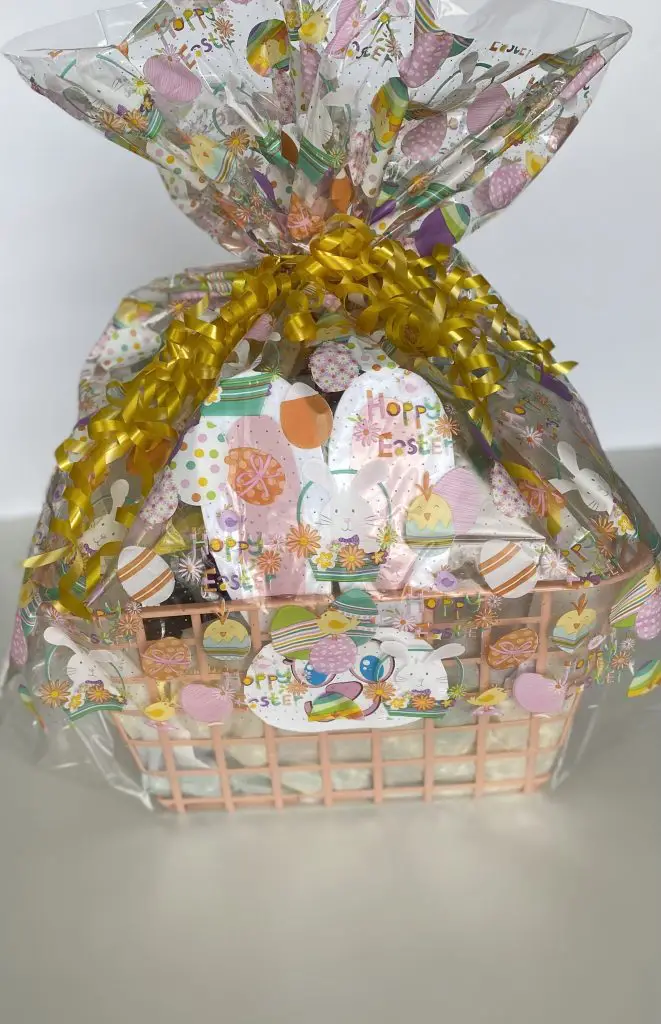
I found this cute basket gift wrap, in came in a pack of 2. All I did was add a cute little bow and ta-da! Good to go!
I hope this was helpful to you and you found that you really can make a cute, meaningful and inexpensive Easter Basket. Hope you have a Happy Easter!
Curious to know more about our life on the farm? Find our more here.

Leave a Reply